Activities Plus Tips and Tricks
Welcome to Activities Plus! The new enhanced way of working with your activities. Activities Plus will increase your productivity and give you a better overview of your tasks, your team's tasks, status of a project, follow-ups, and more!
Activities can be private for personal work and task management, or shared for collaborative work with colleagues in your organisation.
Where Are the Activities?
Your existing activities are moved to Activities Plus. The previous, older version of HCL Connections Activities is not available in Connections Cloud any longer. When you create a new activity, it will be created in Activities Plus.
Find your activities in Activities Plus by clicking:
Apps – Activities Plus in the Menu Bar of Connections.

An activity can be a stand alone Activity or connected to a Connections Community, a Community Activity.
Both a stand alone Activity and a Community Activity can be found by clicking Apps – Activities Plus in the Menu Bar. Community Activities can also be found in the Connections Community they are added to.
Stand Alone Activity
To access and work with a stand alone Activity, go to the Activities Plus page by clicking Apps – Activities Plus in the Menu Bar.
Here you can work with your existing Activities, or create new ones.
Community Activity
A Community Activity is an Activity that has been added to a specific Connections Community. The members of the Community are also members of the Community Activity. Collaborate and access the Activity directly in the Community.
If you cannot see any Activities in a Community, the Activities Plus widget needs to be added to the Community. The Community Manager has access rights to do that.
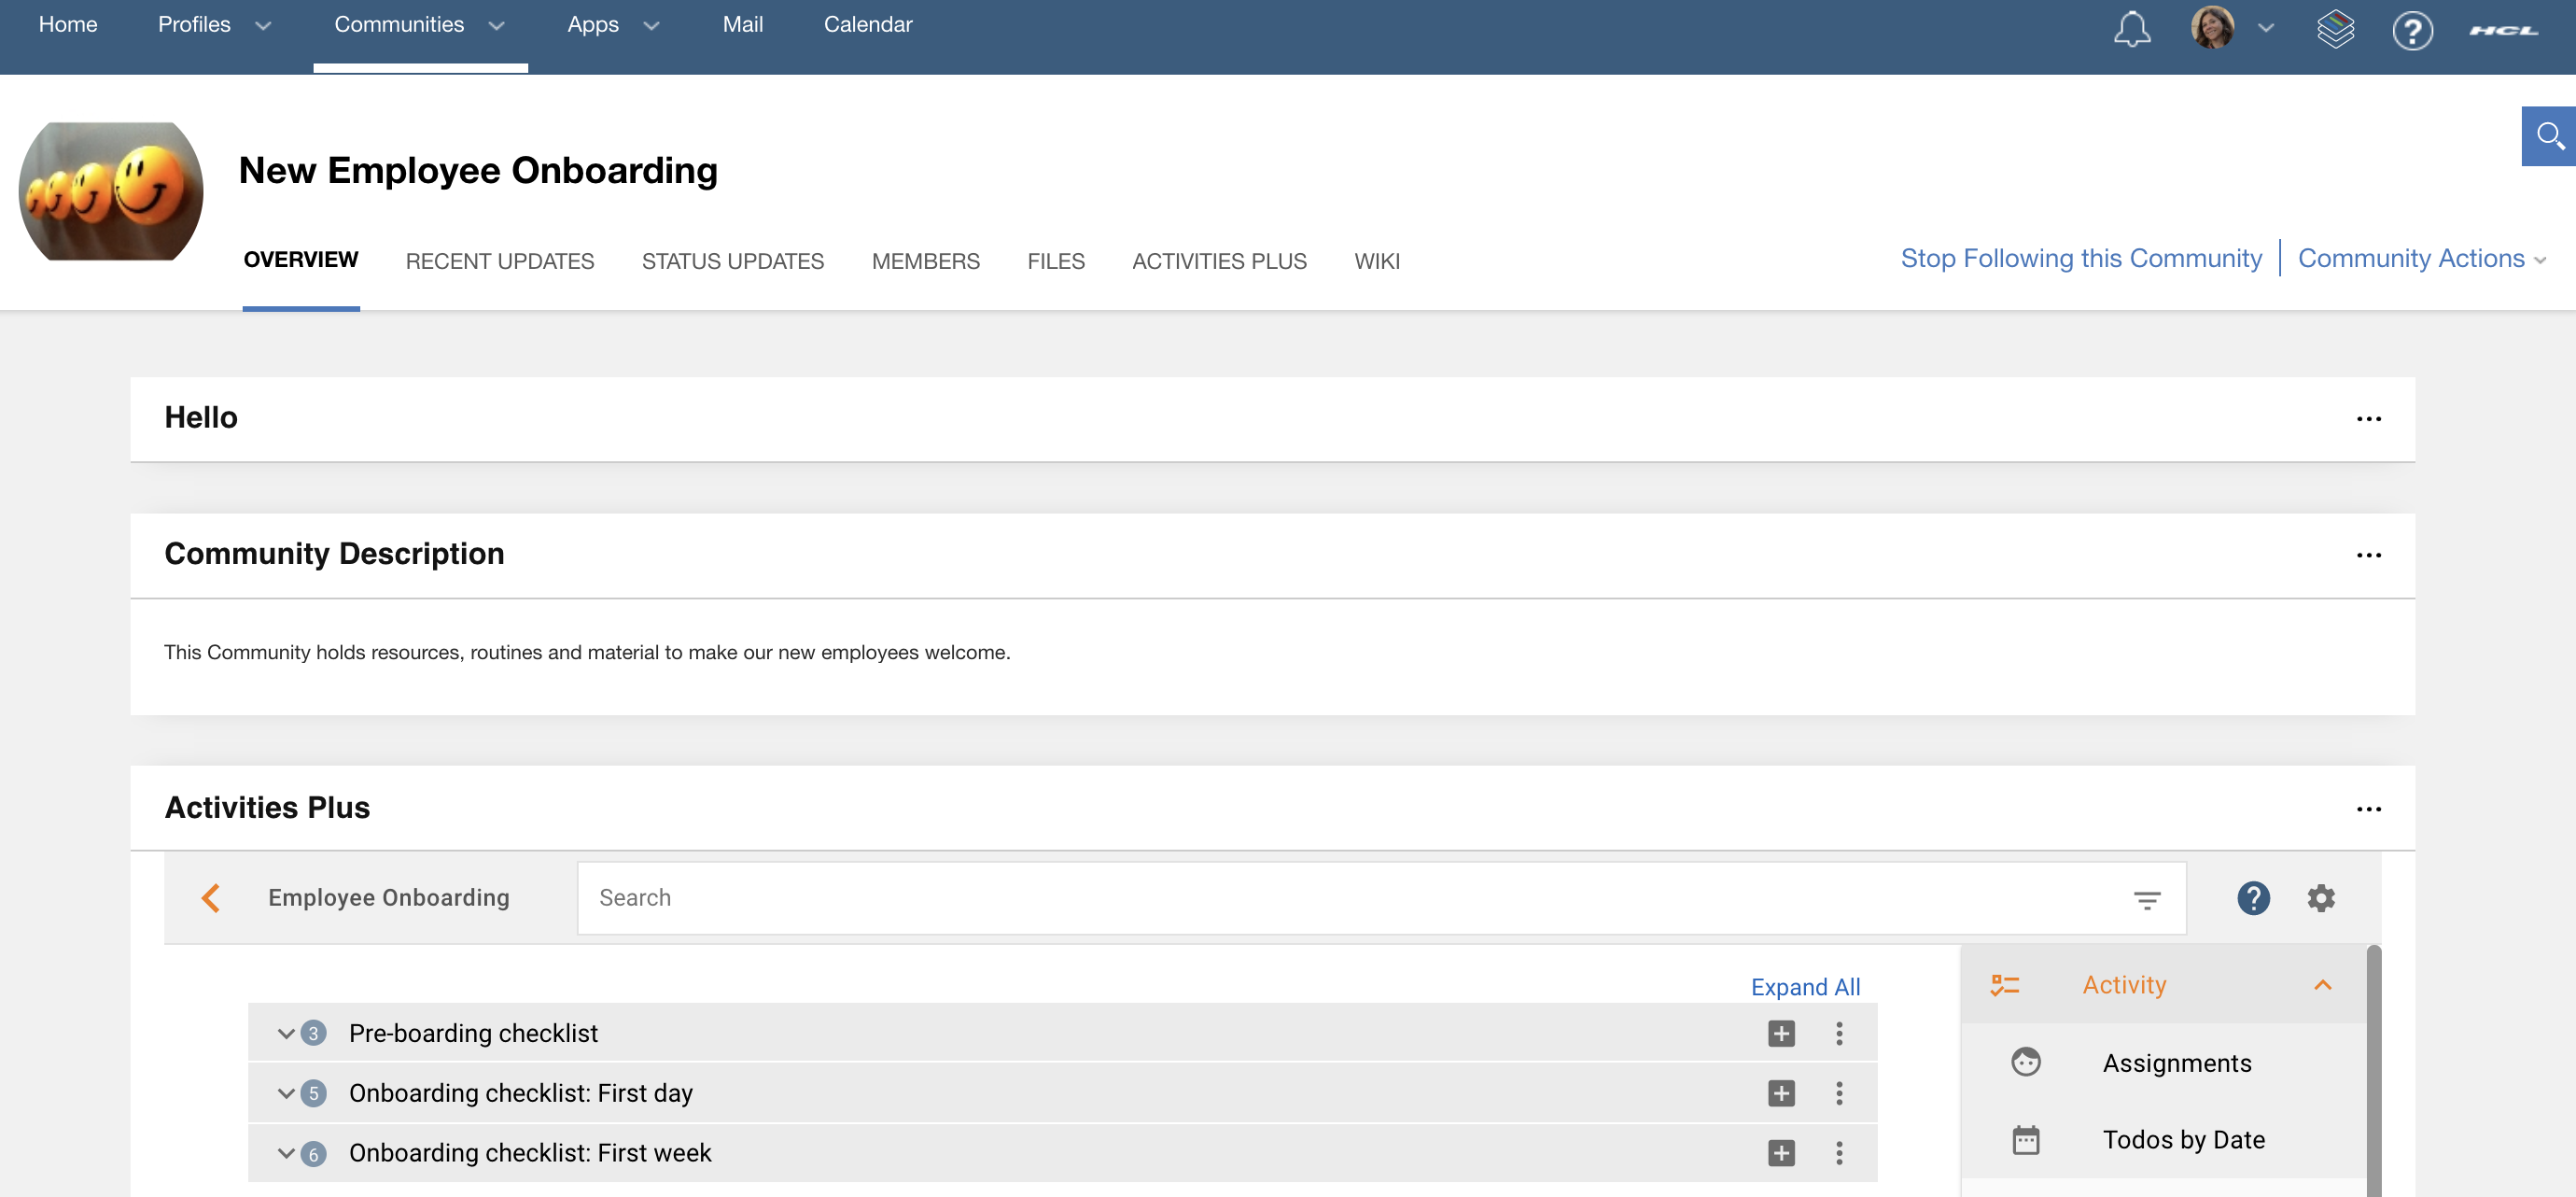
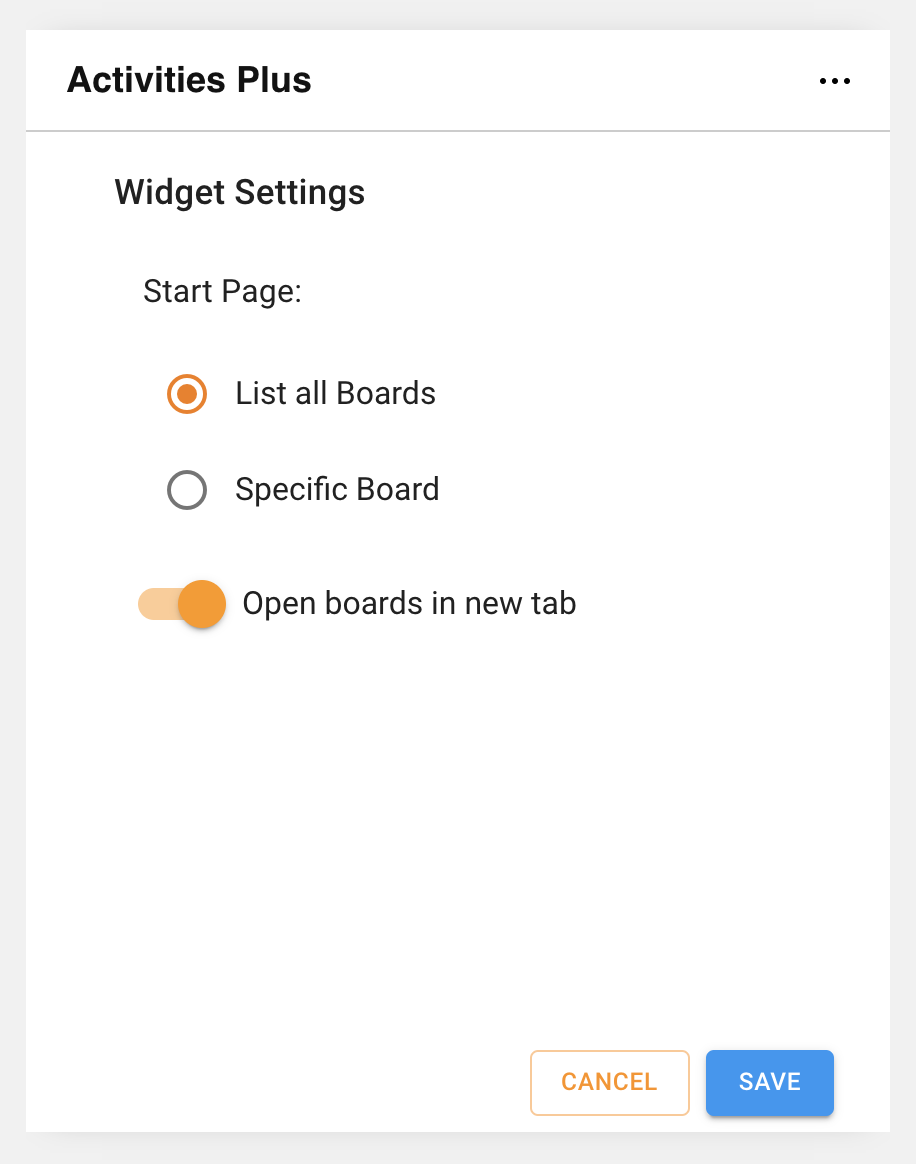
Once the widget is added you have the option to show all Community Activities/Boards that belongs to this Community, or a specific Activity/Board. If you want to change these settings after saving, click on the settings wheel inside the widget.
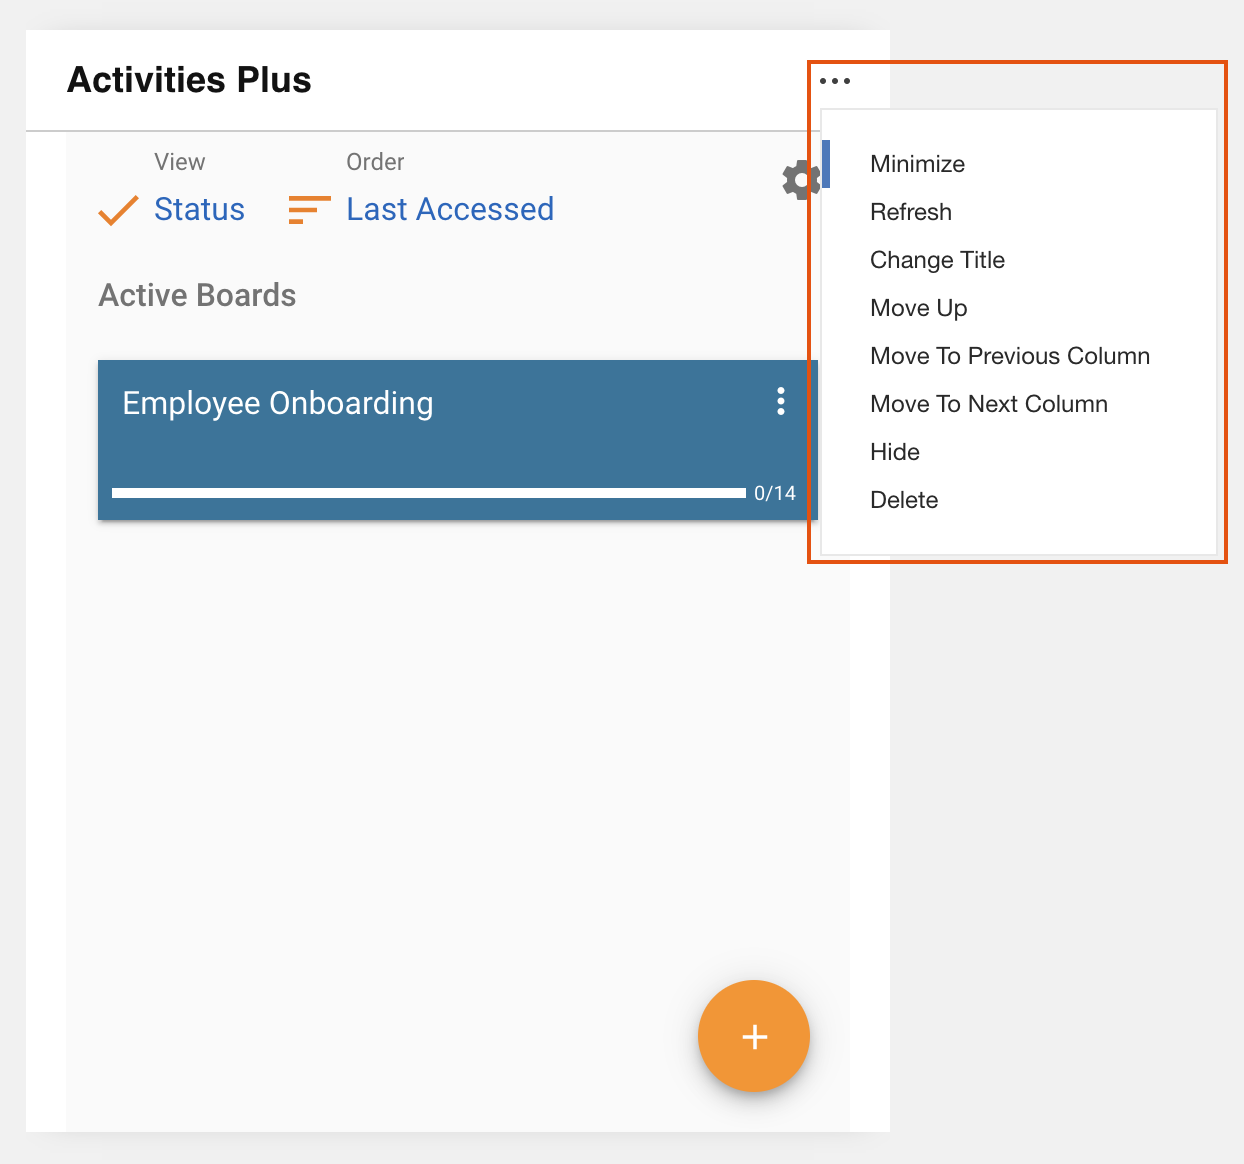
The new widget in the Community can be moved by dragging and dropping, or by clicking on the three dots in the upper right corner.
A great tip is to move the Activities Plus widget so it covers the whole page, by dragging and dropping. When the widget is larger you get a better overview of your work.

If the Community already is a member of an Activity you will directly see that Activity in the widget. Start working immediately!
If you do not see any Activities you can add Activities now.
Add an existing Activity into the widget
Go to the Activities Plus page by clicking
Apps – Activities Plus in the Menu Bar

Open the Activity of your choice by clicking on it.
Open the Members section of the Activity by clicking on Members in the right hand side
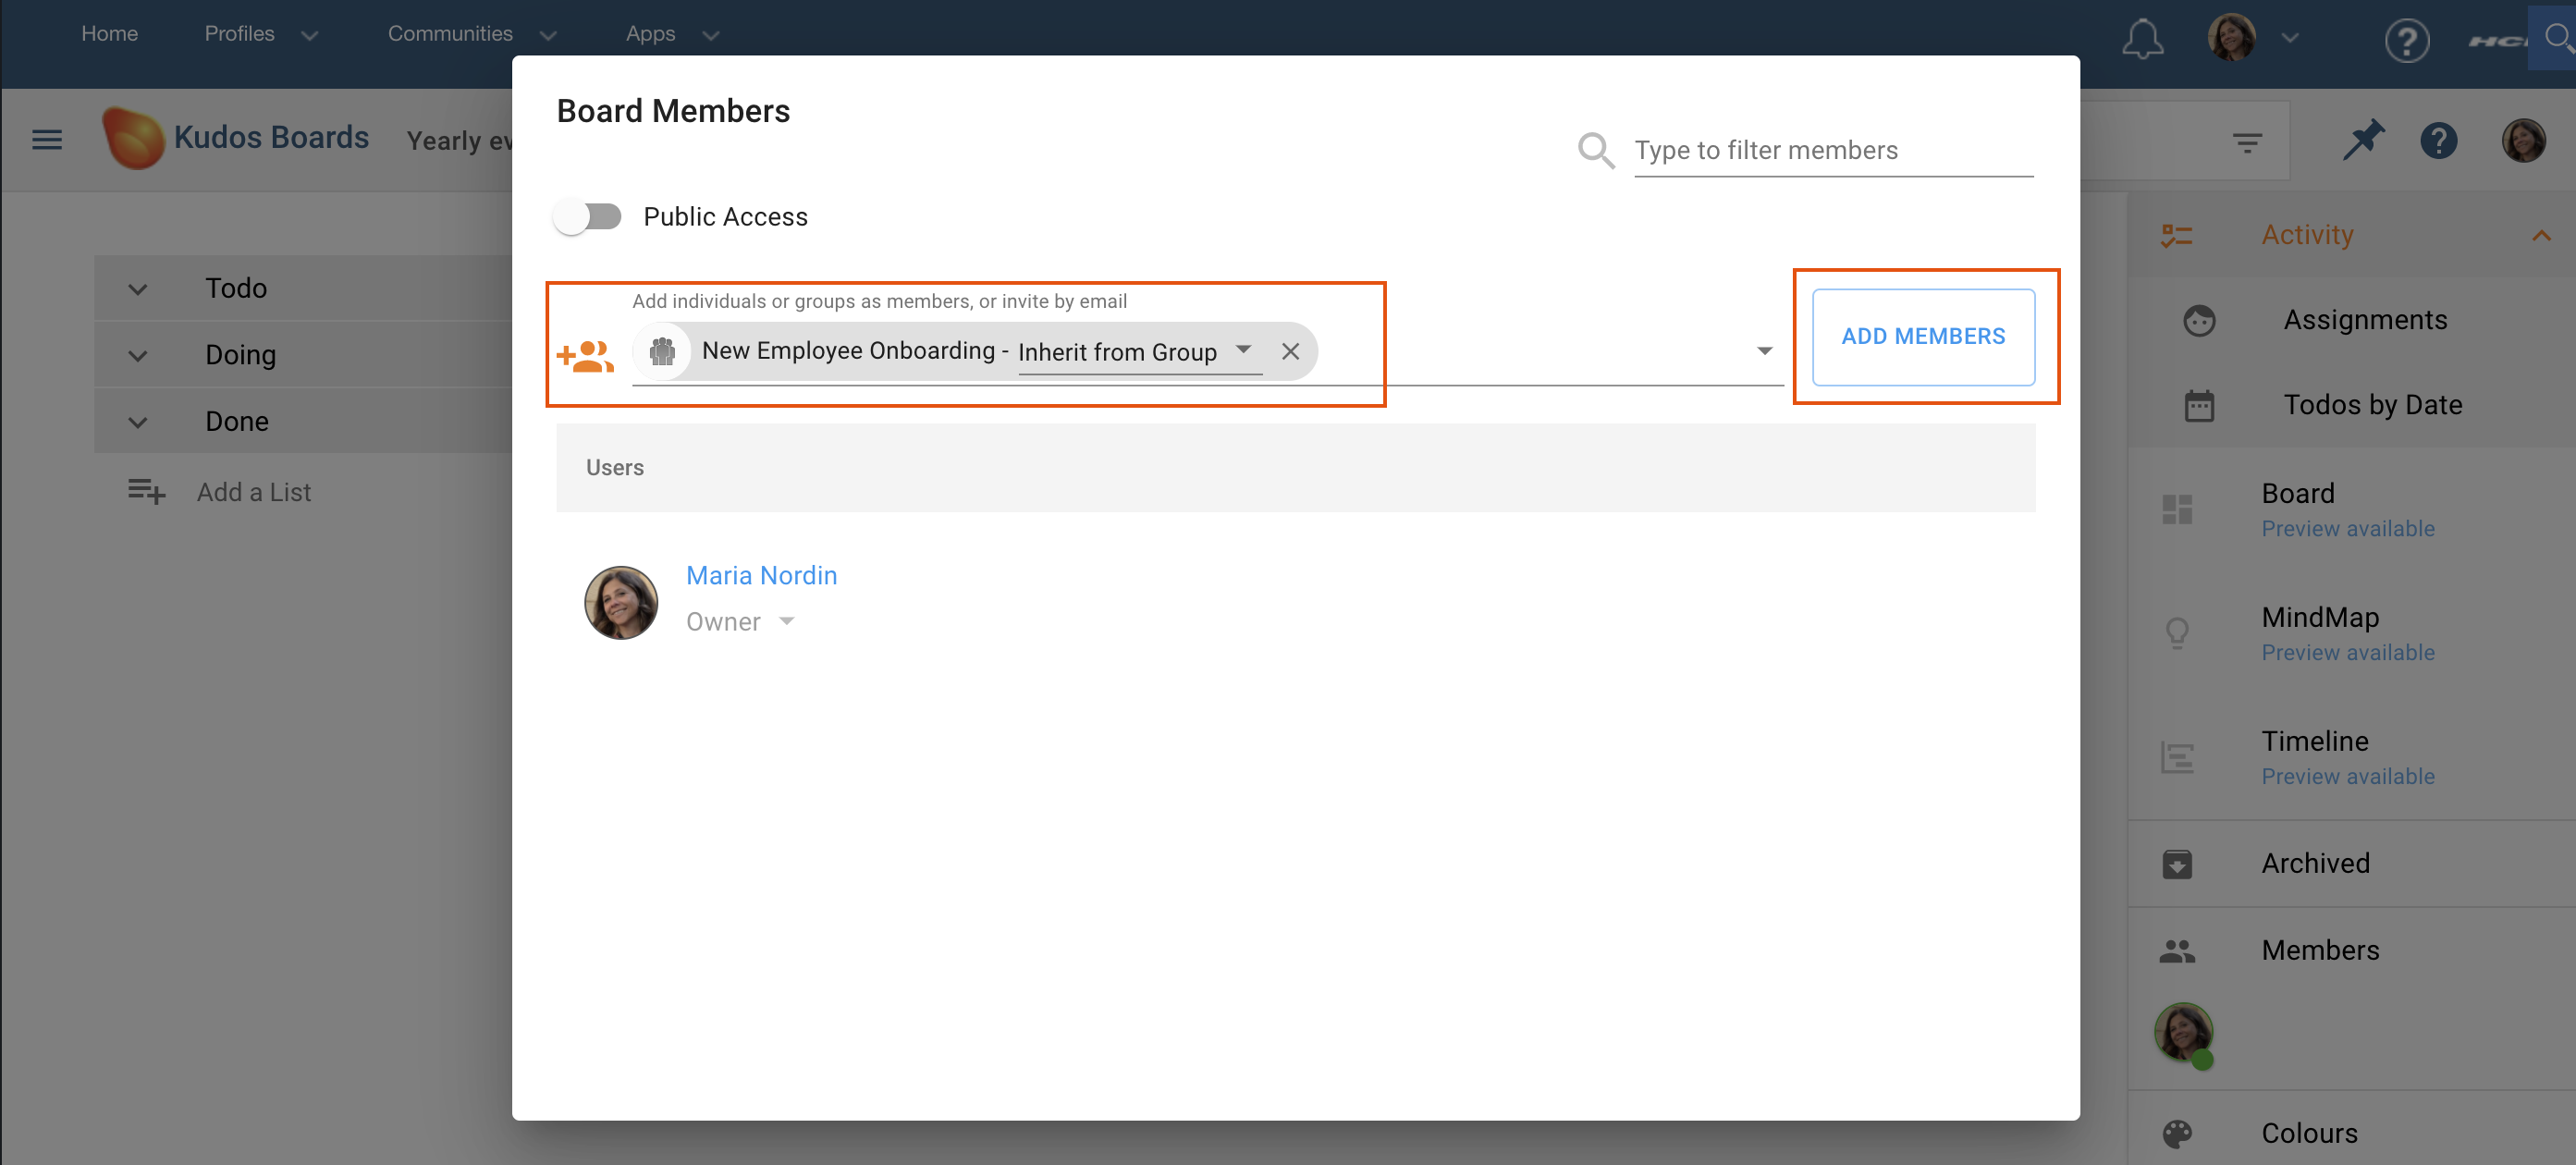
In the field Add individuals or groups type the first letters of the Community name you want to add the Activity to, and select it.
All members of this Community will now be added as members into the Activity. The Activity will also be added into the Community, and be visible in the widget.
Before you click Add Members and close the dialogue box you have the option to set access rights for the members who will be added to the Activity.
Go back to the Community and have a look in the Activity Plus widget. Now you will see your Community Activity.
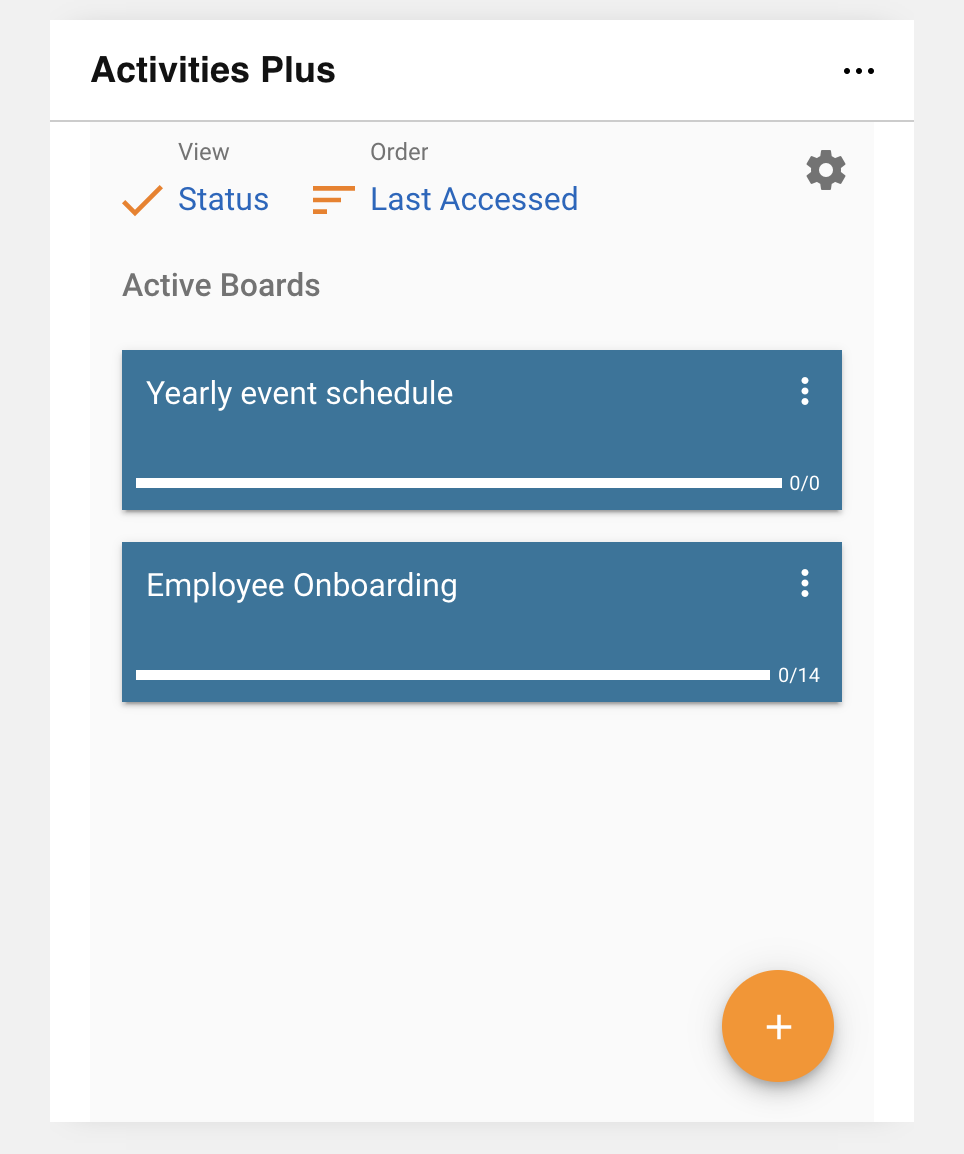
Create a new Activity in the Community Widget
In the Activities Plus widget, click the Orange plus in the bottom right hand side corner. A dialogue box will open with options for your new Activity.
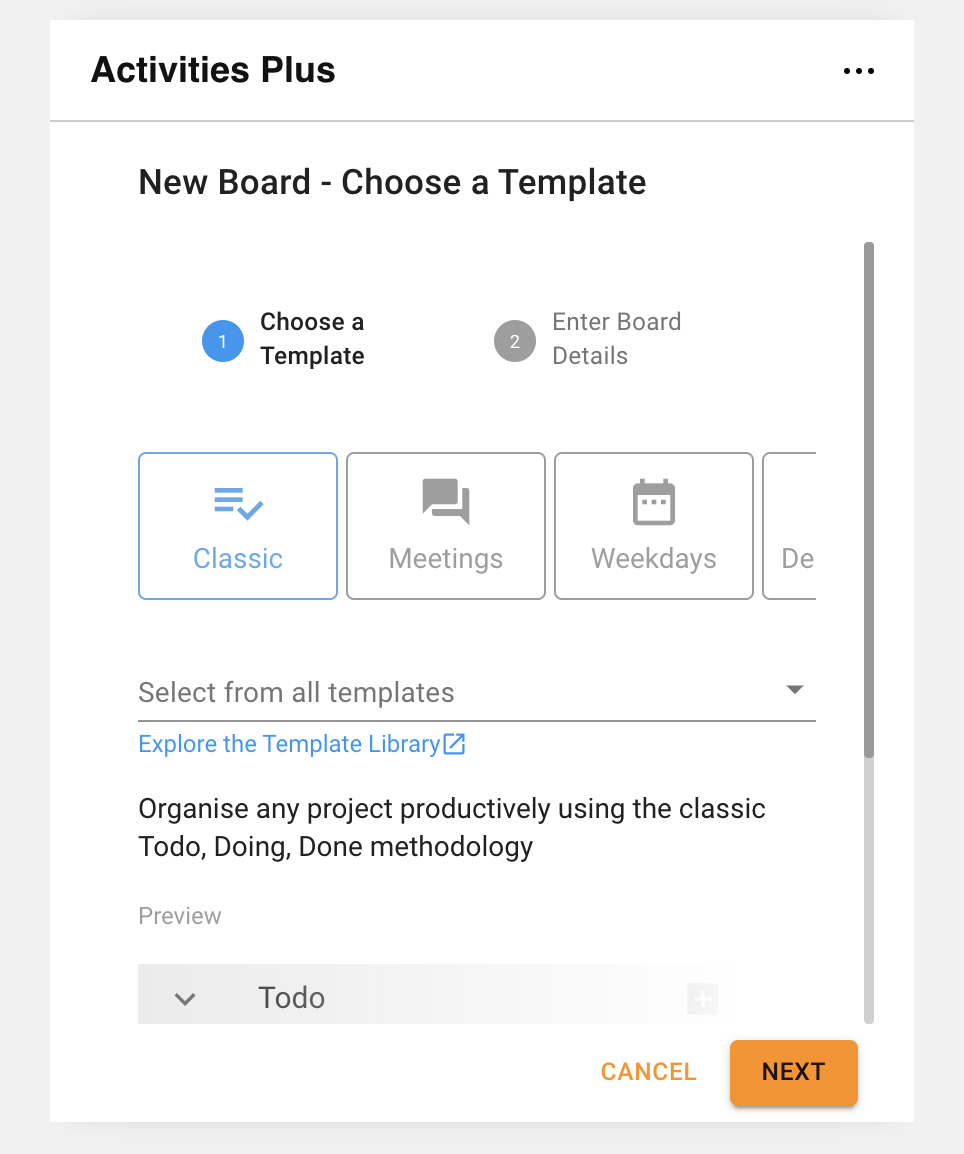
Once the new Activity is created you will see and be able to work in this Activity directly in the Community.
You can also work in this Activity if you go to the Activities Plus homepage. If you open the Member section of the Activiy, you will see that the Community now is a Member of this Activity.