Customize the UI
What is possible
- change css settings (color,sizes,...)
- change the logo (see Example 1)
- add widgets or additional functions (advanced javascript customizations)
- add additonal links in the header
What do you need
- time
- CSS and JavaScript know-how
- Browser with WebDeveloper Exensions
- Chrome User CSS extension
- coffee or tea
Where to start
Examples are a good way to start.
Example 1: Change the logo
You need:
- a logo, size 120px X 35px
- a css file
- a json file
- your OrganizationId, in this example its 5000000001
logo.css
The css changes to change the logo.
.lotusui30 div.lotusBanner .lotusLogo {
    background-image: url('/files/customizer/5000000001/logo/images/logo.png');
    background-repeat: no-repeat;
    background-size: 120px 35px;
    background-position-x: center;
    background-position-y: -1px;
    margin-top: 5px;
    border-radius: 5px;
}

.lotusui30 div.lotusBanner .lotusLogo .lotusAltText {
    color: transparent !important;
}
URL's to your images need to start with /files/customizer/[OrganizationID]
logo.json
{
        "name": "orga.collab.cloud.custom",
        "title": "orga Logo",
        "description": "ORGA logo",
        "services": [
                "Customizer"
        ],
        "extensions": [
                {
                        "name": "orga.collab.cloud.logo",
                        "type": "com.ibm.customizer.ui",
                        "payload": {
                                "include-files": [
                                        "5000000001/logo/css/logo.css"
                                ]
                        },
                        "cache-headers": {
                           "cache-control": "max-age=0"
                        },
                        "path": "global"
                }
        ]
}
This json is used to register the customization in the app registry. A complete reference for the json file can be found here
The files included in the include-files statement need to start with your org id
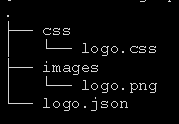
Project Structure
Based on the paths in the logo.css, logo.png and logo.json the files need to be put in the following structure:
Result
The logo.png is now next to the Home link.
Before: No logo
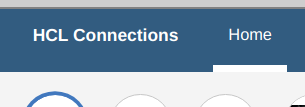
After: ThreeThirds logo
![]()
Example 2: Change the Header/Banner Color
-
Use the WebDeveloper Tools to find the element in the UI.
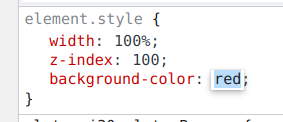
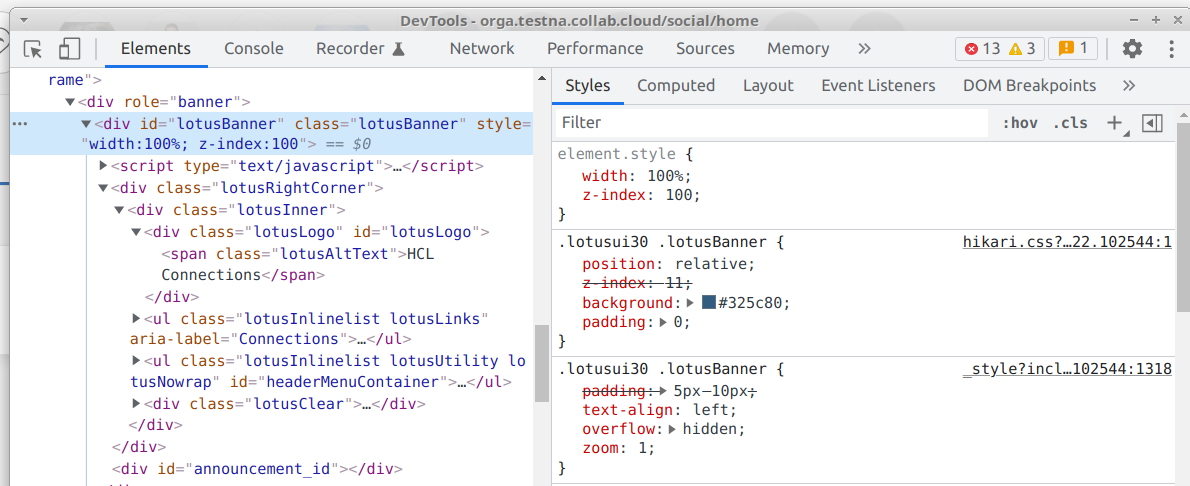 Change the element.style directly in the WebDeveloper Tools to verify that you have the correct element.
That was the wrong element, the header still has the original color:
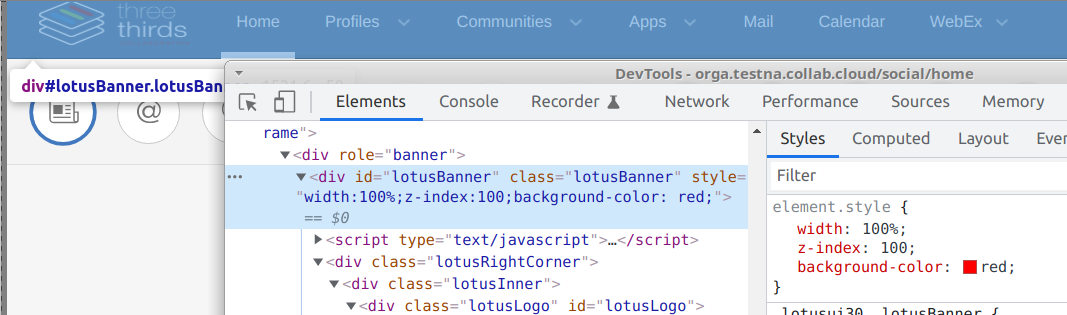
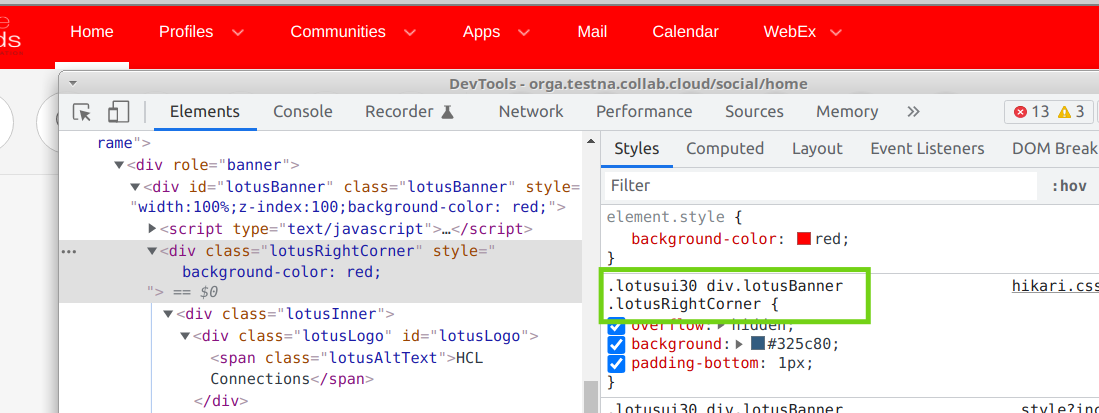
Finally got the right element:
-
Extract the right CSS selector From the screenshot above, we get the first css selector below element.style:
.lotusui30 div.lotusBanner .lotusRightCorner
Change things in the WebDeveloper Tools is a quick way to get the right CSS selectors. But changes in the WebDeveloper Tools are lost as soon as you reload the page.
-
Put your all your changes in Google Chromes User CSS extension.
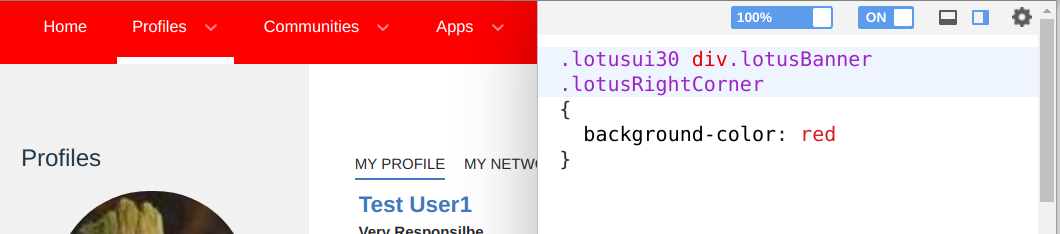
This extension persists your CSS changes between reloads. Even if you restart your browser. This allows you to test the changes on all pages. Verify that your changes do not accidentially break stuff. -
Once you're done with the changes, they need to be deployed.
Deployment process
We don't have an automated way yet. You need to create a support ticket and attach the zipped code (css, js, images) to it. Once the files are deployed, the change need to be activated in the appreg.